Bike Rack Spacing and Layout
Racks spaced too tightly lose half their capacity and spill bikes into walkways. These are the clearances and layout patterns that keep every space usable.
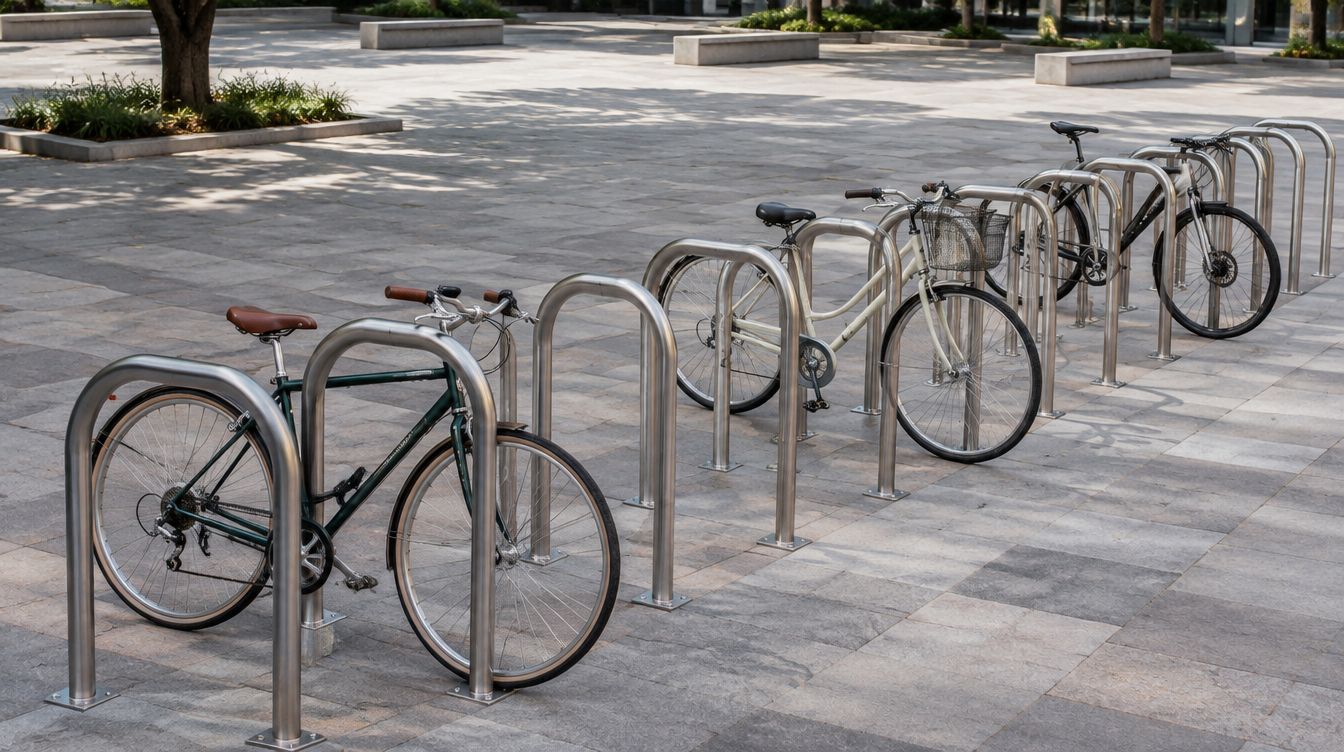
A well-chosen rack can still fail if it is installed in the wrong spot. Bikes are long, handlebars are wide and people need room to wheel in, crouch down and fit a lock. Get the spacing wrong and a row of ten two-bike racks holds ten bikes, not twenty. Get the placement wrong and parked bikes block a sidewalk, a door or a curb cut. This guide sets out the dimensions most designers work to and the layout patterns that use space efficiently.
The dimensions of a parked bike
Every layout starts with the space one bike occupies. The figures below are common planning values used in bike parking guidance such as APBP's Essentials of Bike Parking. Treat them as starting points and check your local zoning or design manual, which may set its own numbers.
| Item | Typical planning value |
|---|---|
| Length of a parked bike | 1.8 m (6 ft) |
| Width taken by a bike at the handlebars | about 600 mm (24 in) |
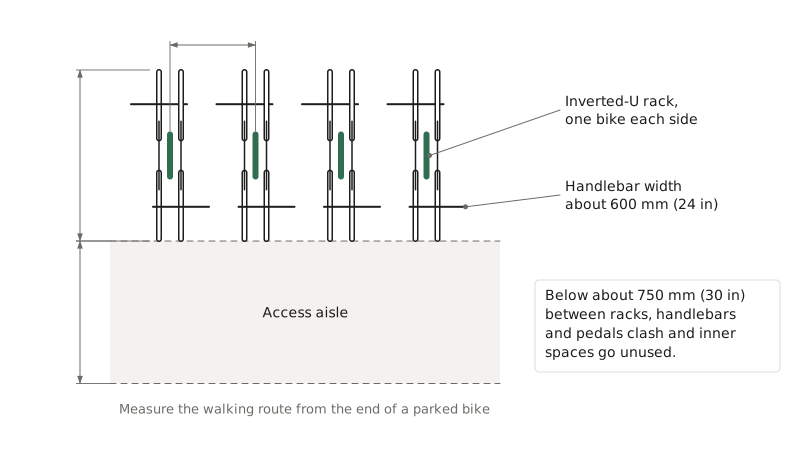
| Inverted-U racks side by side, on centre | about 900 mm (36 in) |
| Rack parallel to a curb, from curb face | at least 600 mm (24 in) |
| Access aisle behind a row of bikes | 1.5 m (5 ft) or more |
| Extra length for cargo bikes and trailers | 2.4 to 3 m (8 to 10 ft) |
The on-centre spacing between racks is the number people most often shrink to fit a tight site. Pushing inverted-U racks much closer than about 750 mm (30 in) means handlebars and pedals clash, and the inner spaces stop being used.
Clearances to walls, curbs and other objects
A rack needs room on every side a bike will occupy. A two-sided rack needs the full bike length on both sides, so a rack set perpendicular to a wall should be about one bike length from it, plus a little extra so the rear wheel does not rub the wall.
- Parallel to a wall: set the rack far enough out that a bike can park on the wall side. In practice that means roughly 750 to 900 mm (30 to 36 in) from the wall to the rack centreline. If that is not possible, accept that the rack is one-sided and count it that way.
- Next to a curb with parking or traffic: keep racks back from the curb face so car doors can open and bikes do not hang over the road. Placing racks parallel to the curb keeps bikes out of both the street and the walkway.
- Near doors, hydrants and transit stops: keep a generous buffer. Local rules often set minimum distances from fire hydrants, building entrances and bus stops. Confirm them with the municipality before you finalize the plan.
- Near trees, benches and receptacles: allow room for a bike plus a person. Tightly grouped furniture creates pinch points.
Protect the accessible route
The most serious layout mistake is letting parked bikes intrude into the pedestrian path. Remember that the bike, not the rack, defines the edge. A rack set back from the walkway can still put a rear wheel across it.
Measure the clear walking route from the end of a parked bike, not from the rack. In Canada, CSA B651 and provincial standards such as Ontario's AODA Design of Public Spaces standard set requirements for clear width, cane-detectable obstacles and protruding objects. Municipal sidewalk standards often ask for more. Keep racks in the furniture or amenity zone of the sidewalk, in line with poles and trees, so people with low vision can predict where obstacles are.
Common layout patterns
Most sites use one of a few arrangements:
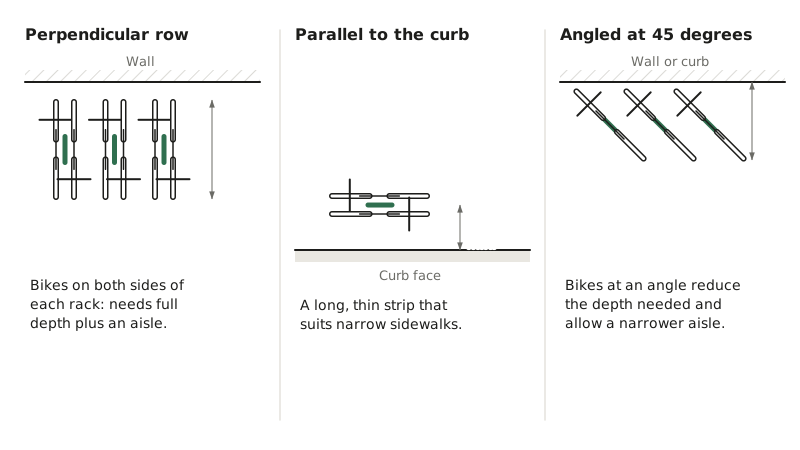
- Single row, perpendicular to the curb or wall. Racks in a line, each holding a bike on each side. Simple and easy to read. Needs the full parking depth on both sides plus an aisle.
- Single row, parallel to the curb. Racks in line with the curb, bikes parallel to traffic. Ideal for narrow sidewalks because the bikes occupy a long, thin strip.
- Double row with a shared aisle. Two rows of racks facing a central aisle. Efficient for larger parking areas and plazas.
- Angled racks. Racks set at about 45 degrees to a wall or curb reduce the depth needed. Bikes park at an angle, and the aisle can be narrower. Useful where depth is limited.
- On-street corral. Several racks installed in one former car parking space, protected by curbs, bollards or planters. One car space can typically hold many more bikes than cars.
Rail-mounted sets of loops make these patterns easier, because the spacing between loops is fixed at the factory. Our Loop Rack rail sets, for example, hold loops at about 900 mm (36 in) on centre.
A layout checklist
- Sketch bikes on the plan at full size, not just the rack outlines.
- Confirm parking depth on both sides of every two-sided rack.
- Check the walking route from the tip of each parked bike.
- Leave an end space or two with extra length for cargo bikes and trailers.
- Keep racks out of plow paths and snow storage areas, or plan for winter removal.
- Check drainage. Racks in a puddle or ice patch go unused.
- Confirm buffers to hydrants, doors and transit boarding areas with the local authority.
- Make sure there is lighting at night and a clear line of sight from an entrance or street.
Mistakes that cost capacity
- Racks against a wall that are meant to be two-sided. One side is lost, and people squeeze in anyway, scratching the wall.
- Racks too close end to end. In a perpendicular row, leave space between the ends of rows so people can walk through.
- Wave racks with no room in front. People park along the length of a wave rack rather than through its bays, which cuts capacity. Give it a clear approach on both sides.
- Racks squeezed between planters or benches. Handlebars hit the furniture and the rack becomes a one-bike rack.
If you send us a site plan, we can lay out racks to these clearances and tell you how many usable spaces fit. See contact details to get started.
Frequently asked questions
How far apart should inverted-U bike racks be?
About 900 mm (36 in) on centre is a common recommendation for racks side by side. That gives each bike enough room for handlebars and for a person to lock up. Tighter spacing saves room on paper but usually loses spaces in use.
How much space does one bike parking space need?
Plan for a footprint of roughly 1.8 m by 600 mm (6 ft by 2 ft) per bike, plus a shared access aisle. Larger bikes need more length.
Can bikes park on a sidewalk next to the road?
Usually yes, in the furniture zone between the walking path and the curb, as long as the clear walkway width required locally is kept. Many municipalities have a permit process for racks on public sidewalks, so check with them first.