Creating a Site Furniture Master Plan
A site furniture master plan sets one standard for what furniture you buy, what color it is and where it goes, so every new project adds to a coherent whole instead of a patchwork.
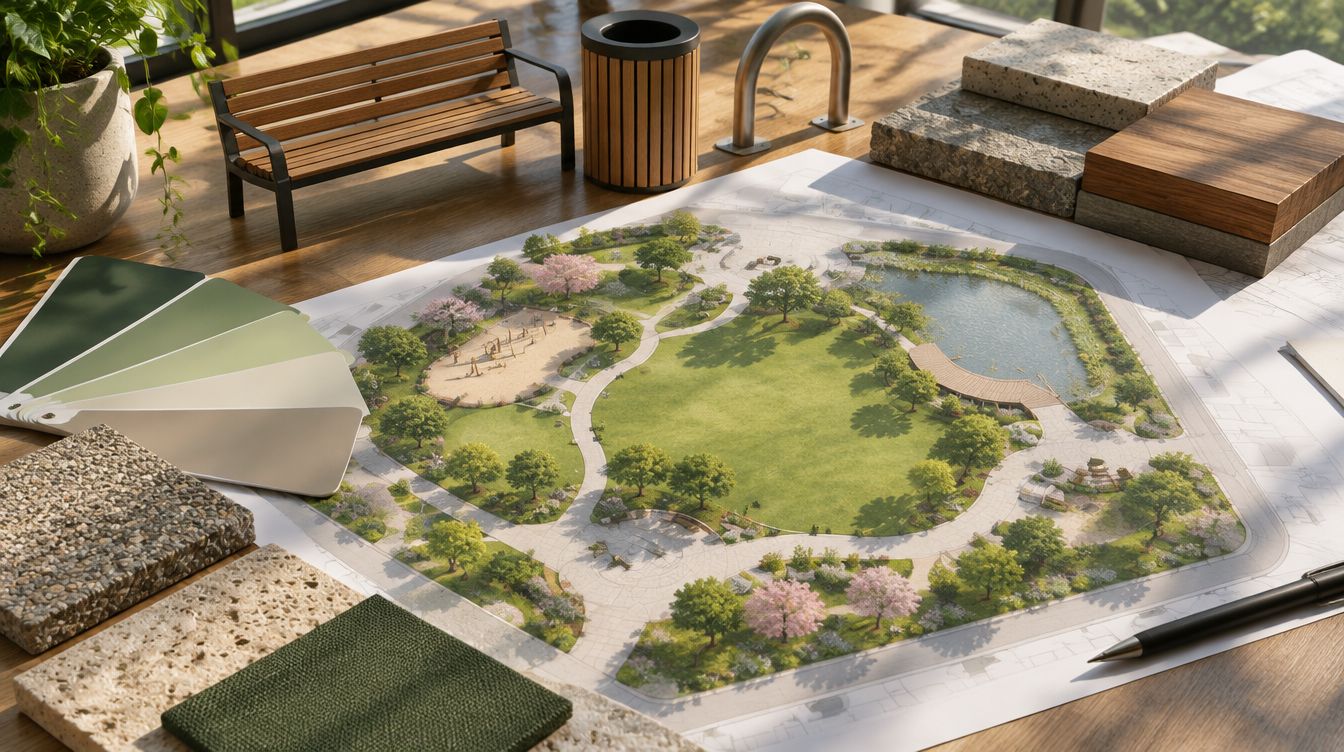
Walk through most older campuses or downtowns and you can read the history of furniture purchases: three bench styles, four receptacle colors, racks from five different decades. Each purchase made sense at the time, but together they look disorganized, need different spare parts and confuse maintenance crews. A site furniture master plan fixes that. It is a short document that standardizes the furniture families, finishes and placement rules for a whole site, so every capital project and replacement follows the same playbook.
Who needs one
Master plans pay off wherever many people make furniture decisions over many years:
- Municipalities with several business districts, parks and transit corridors.
- University, college and hospital campuses.
- School boards and districts with dozens of sites.
- Business improvement areas and downtown associations.
- Large residential or mixed-use developments that will be built in phases.
Even a single large park benefits if construction will happen in stages over several budget years.
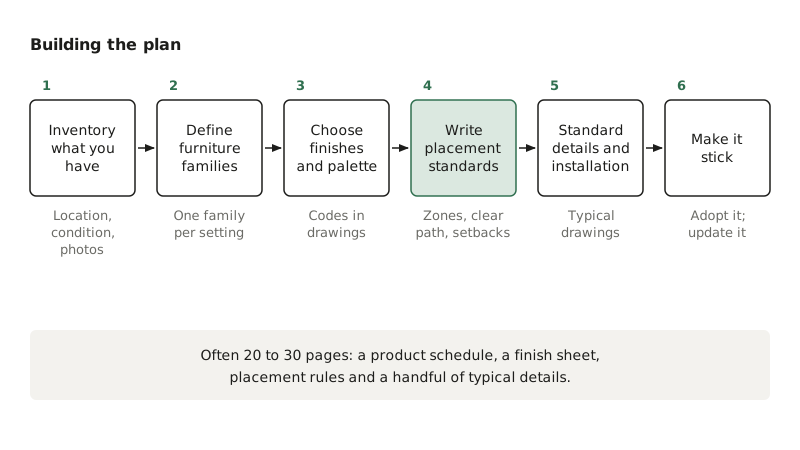
Step 1: Inventory what you have
Start with a walk-through and a simple spreadsheet or GIS layer. For each piece, record:
- Type, model and manufacturer, if known.
- Location, ideally with coordinates.
- Material, color and mounting method.
- Condition, using a simple scale such as good, fair, poor.
- Any accessibility issues, such as a bench with no clear space beside it or a receptacle opening that is too high.
Photos help. The inventory shows where you have gaps, where you have too much of one thing, and which pieces are near the end of their life. It also becomes the base for the maintenance and replacement plan later.
Step 2: Define furniture families
A family is a set of products that share a design language: similar materials, profiles and details. Most master plans define two or three families rather than one, for example:
- Signature: used in the most visible places, such as a main street, a civic square or the campus core. Higher budget, possibly custom elements such as cut logos.
- Standard: used across most streets, parks and pathways. Durable, readily available models.
- Utility: used in service areas, parking lots and back-of-house locations where looks matter less.
For each family, list the approved bench, backless bench, picnic table, receptacle, recycling unit, bike rack, bollard and planter. Name a model or a performance description for each, with options for size. Keeping the list short is the point. Every extra model adds spare parts and training.
Step 3: Choose colors and finishes
Pick one primary color per family and, at most, one accent color. Dark neutrals such as black, charcoal and deep bronze hide dirt and scuffs well and work with most architecture. Brighter brand colors can work for accents on smaller items or signature zones. Specify each color by a standard code such as a RAL number so any supplier can match it.
Also set the finish system: for example, hot-dip galvanized steel with a polyester powder coat, and a named wood or recycled plastic for seating surfaces. That prevents a future project from buying a visually similar product with a weaker finish.
Step 4: Write placement standards
Product choice is only half the plan. Placement rules make sure furniture works and keeps paths clear. Typical standards cover:
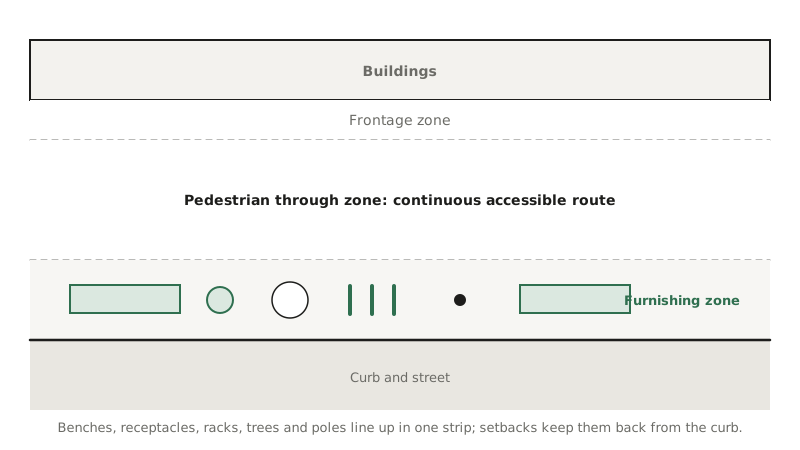
- Furnishing zone. On streets, place furniture in a defined strip between the curb and the pedestrian through zone, not in the walking path.
- Clear path width. Keep a continuous accessible route past all furniture. Minimum widths depend on the 2010 ADA Standards for Accessible Design, public right-of-way guidelines and your local design manual. Many cities set their own wider minimums on busy streets.
- Clear space at seating. Provide a level space beside benches for a wheelchair or stroller.
- Spacing and intervals. Set targets for how often benches appear along routes, and pair receptacles with seating, transit stops and entrances.
- Setbacks. Define distances from curbs, driveways, fire hydrants, crosswalks and building entrances.
- Bike parking. Reference a layout standard. Many US cities base theirs on the APBP Essentials of Bike Parking.
Include typical layout drawings for common situations: a bus stop, a building entrance, a park pathway node. Drawings communicate faster than paragraphs.
Step 5: Standard details and installation
Add standard installation details for each item: surface mount on a concrete pad, embedded in a footing, or rail mounted. Specify anchor types, tamper-resistant fasteners and pad dimensions. When every project uses the same details, crews learn them, and removal or relocation later is predictable.
Step 6: Make it stick
Plans fail when they sit on a shelf. A few habits keep them alive:
- Require the master plan in design consultant terms of reference and project specifications.
- Assign one person or group to approve exceptions.
- Pilot the selected families at one location before full rollout, and gather feedback from users and maintenance staff.
- Replace old furniture as it fails, rather than all at once, and log every new piece in the inventory.
- Review the plan every few years. Products are discontinued, and needs change.
Choosing a supplier who can provide both standard models and matching custom pieces helps here, because signature and standard families can share profiles and colors. Our custom work often starts from a standard product and adapts it for a signature zone.
Frequently asked questions
How long should a master plan be?
Short enough that people use it. A product schedule, a color and finish sheet, placement rules and a handful of typical details often fit in 20 to 30 pages.
Can a master plan name specific products?
It can, but public owners usually also need to allow equivalents in procurement. A common approach is to name a basis-of-design model and describe the key features any equivalent must match.
What about existing furniture that does not match?
Keep it in service until it reaches the end of its life, then replace it with the standard. Repainting older steel furniture in the new color can be a low-cost bridge.